Lately DOBOT Magician has been upgraded to V2. Wondering the differences between Magician V1 and Magician V2? Here is a comparison of the old and new version, thoroughly describing the differences in appearance, I/O interfaces, and sensors. Feel free to check this article any time you have doubts concerning the different versions of DOBOT Magician.
1. Notes
- How to differentiate DOBOT Magician V1 and V2: click “?” on DobotStudio interface and check the hardware version.
- How to differentiate different versions of linear rail kit, photoelectric sensor and color sensor: version can only be identified by the physical label. If the label shows V2, it means the version is V2. While no physical label on the object means V1 version.
- If the rail kit version is V2, you need to select “New Rail” in “Settings > General” of DobotStudio interface when controlling the robot arm through DobotStudio. If the version of the rail kit is V1, leave this option unchecked.
- Photoelectric sensors and color sensors can be connected to multiple ports when connecting to the robot arm. Please make sure that the ports set by Blockly or API are in one-to-one correspondence with the hardware connection port.
2. Description of Appearance Differences
2.1 Similar Appearances of V1 and V2
The appearances and structural designs of V1 and V2 are similar, as shown below:
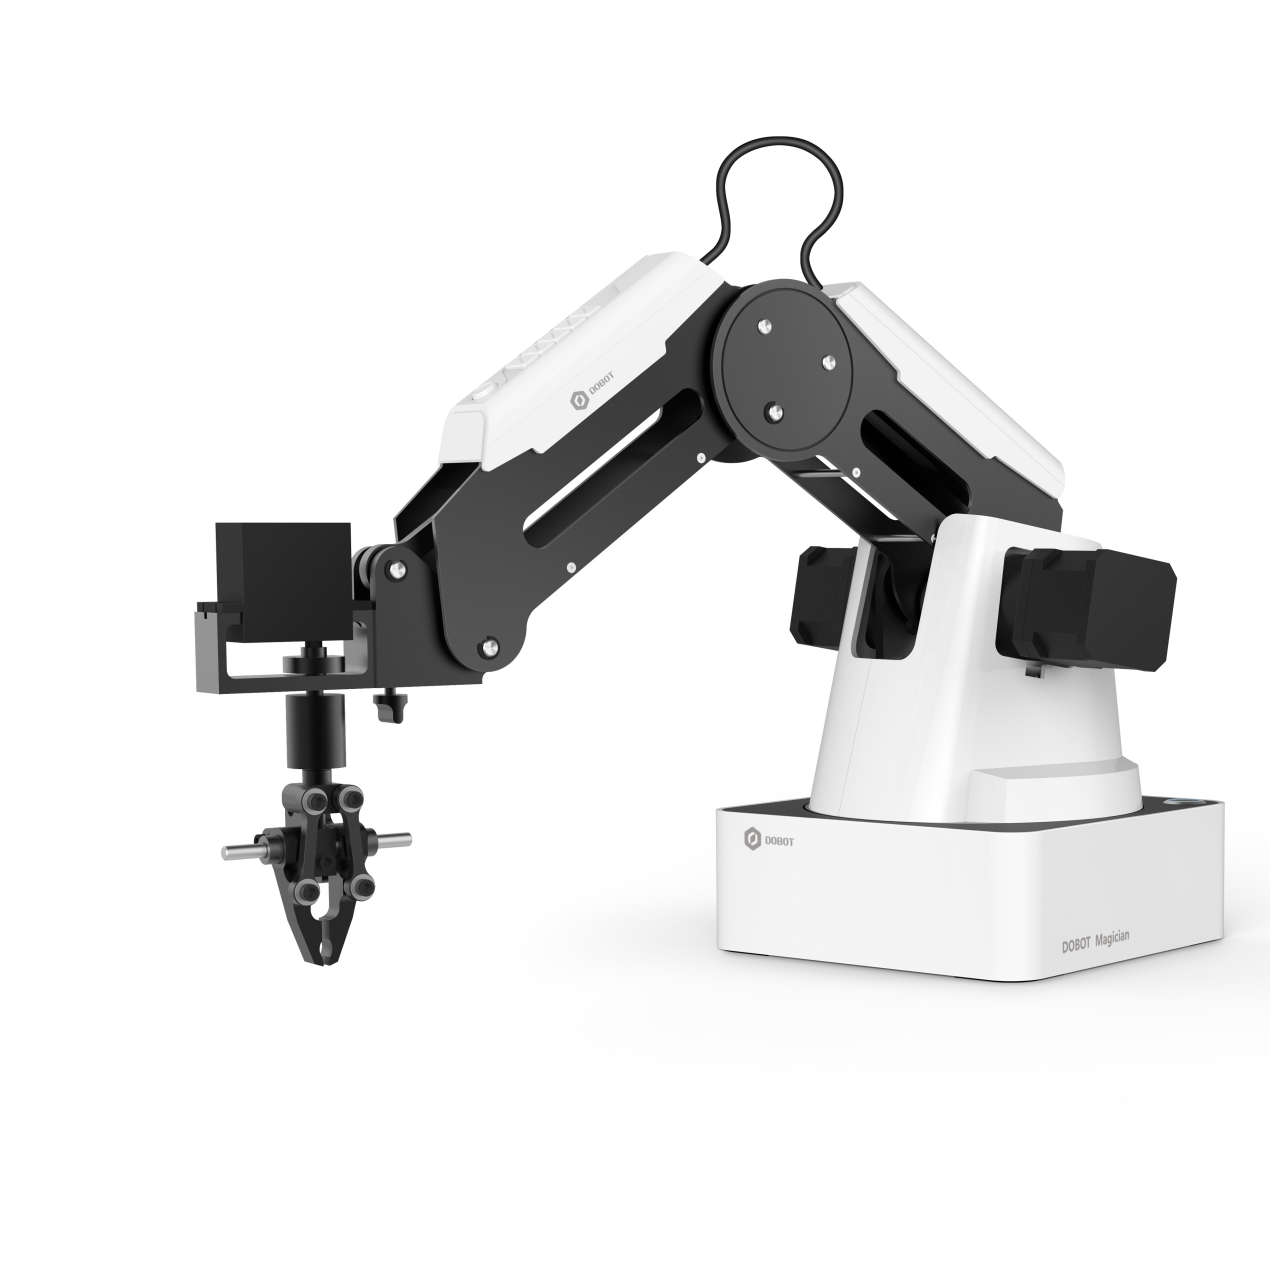
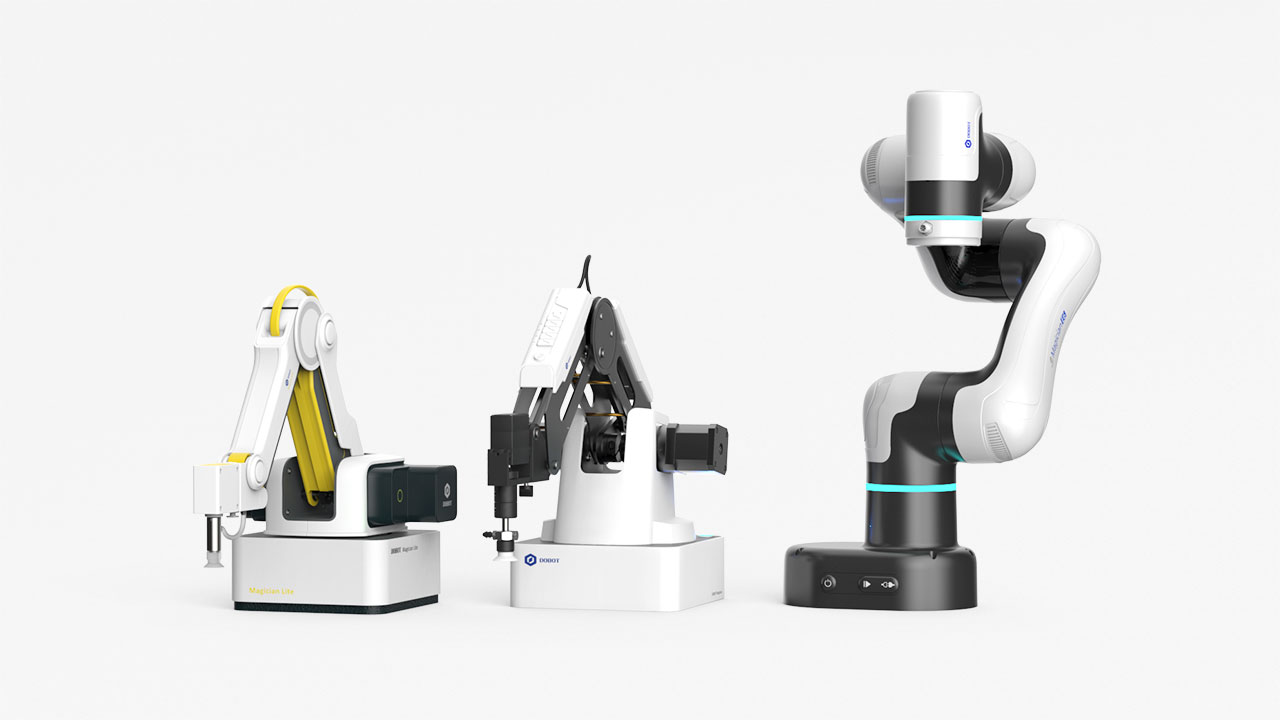
Figure 2.1 - Magician V1 Rendering Image
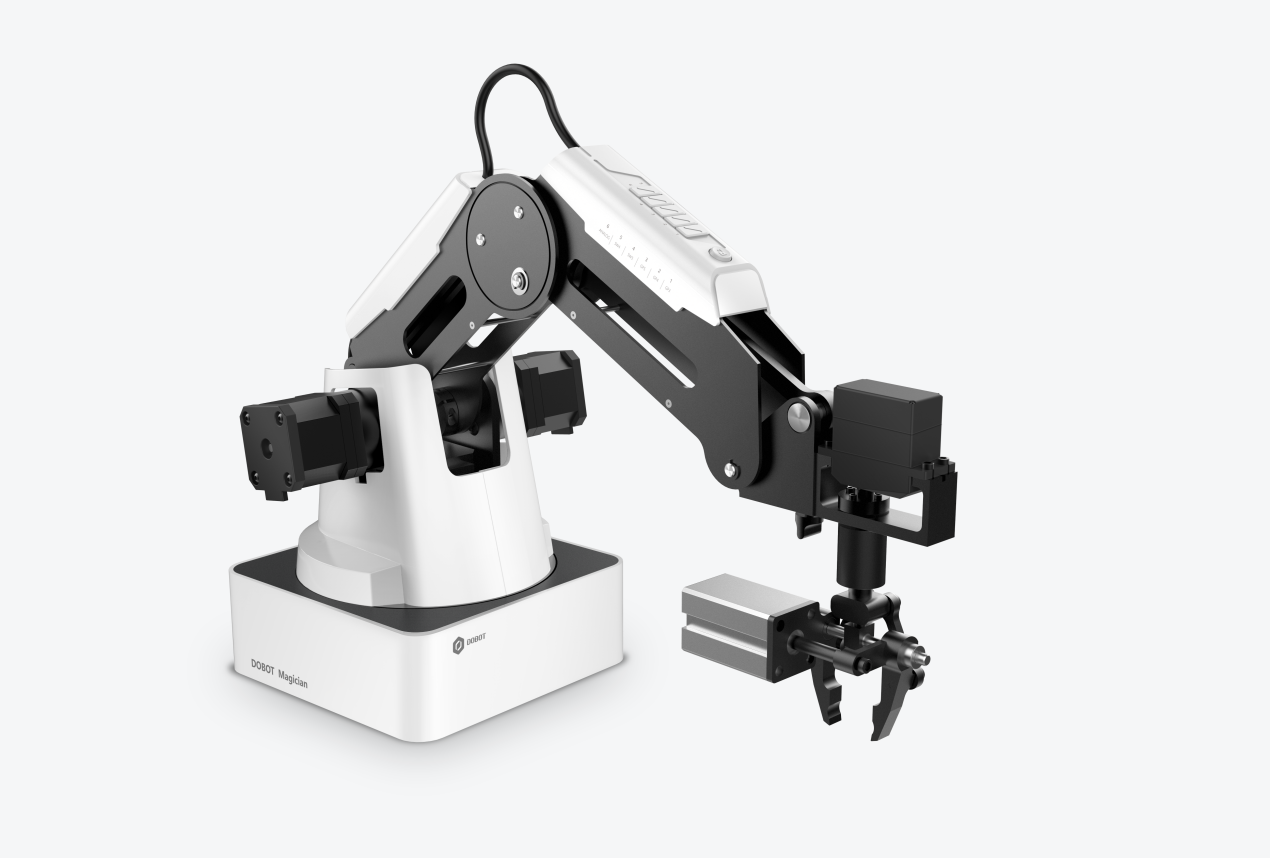
Figure 2.2 - Magician V2 Rendering Image
2.2 Color Change of V2 Ports
V1's ports on the base and forearm are all white, while the color of the V2’s ports has been changed to make it more convenient for users to distinguish and prevent incorrect operations. The universal port GP is green, and the 12V switch SW is red. The stepper port is yellow, and the 3D printing thermistor is blue, as shown below:
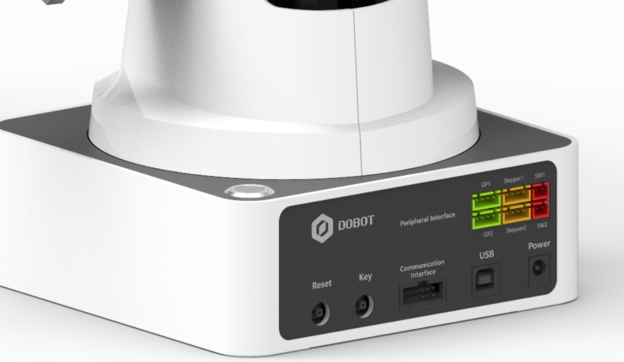
Figure 2.3 - Color change of the ports on the base
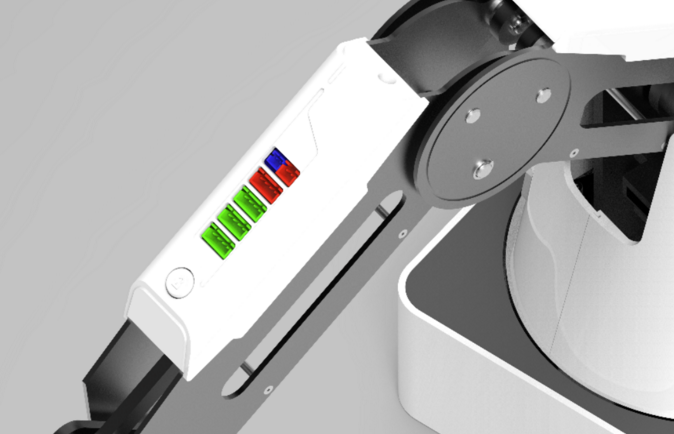
Figure 2.4 - Color change of the ports on the forearm
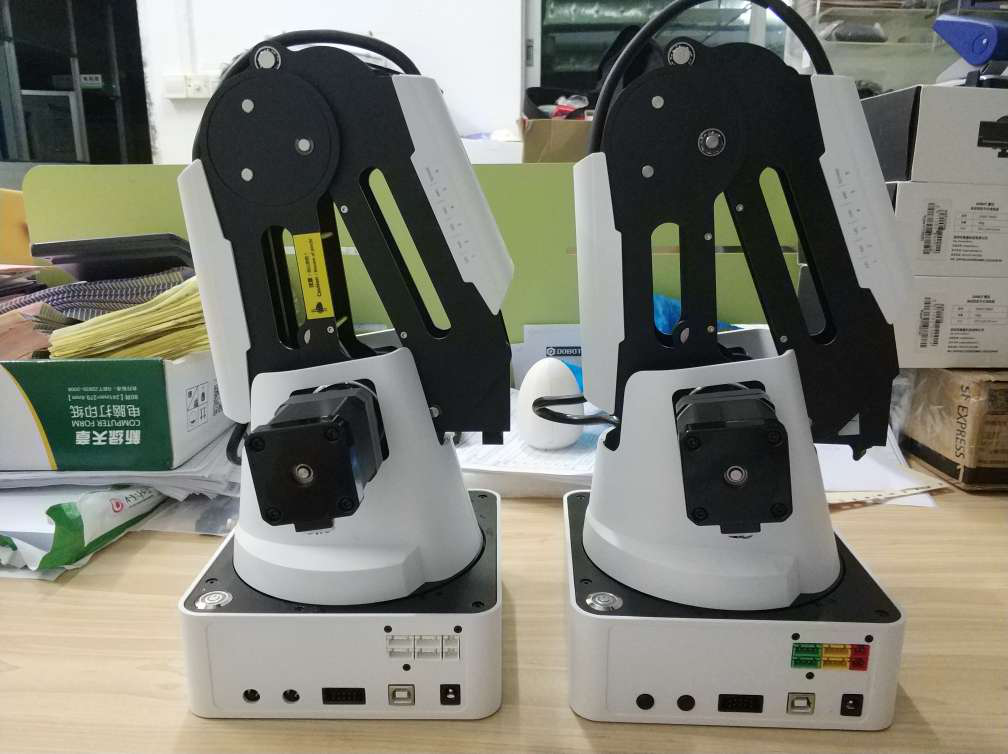
Figure 2.5 - V1 ports (left) vs V2 ports (right) on the base (within the red frame)
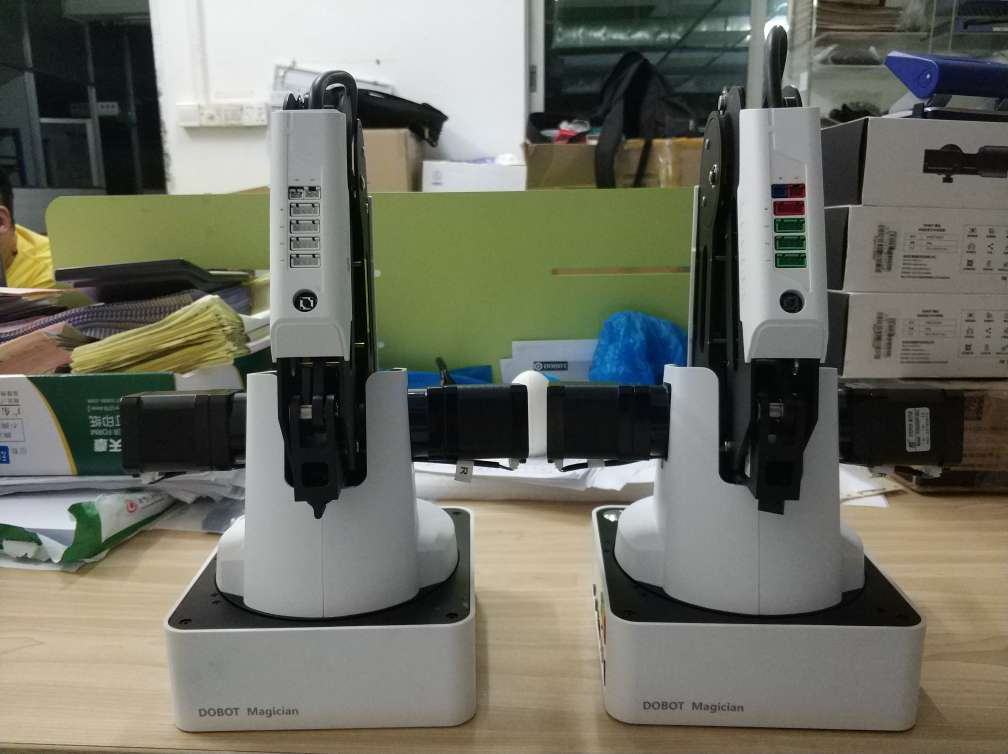
Figure 2.6 - V1 ports (left) vs V2 ports (right) on the forearm (within the red frame)
2.3 Control Axis Change of V2
V1 version’s rear arm and the forearm are connected by a connecting rod. The V2 version is optimized for structural design and is changed to a bearing plus a connecting rod, which improves the accuracy and consistency of the trajectory of the robot arm, including laser engraving, writing, and drawing.
3. Difference Description
3.1 Difference Between V1 and V2

3.1.1 Multiplexed I/O Interface
The total number of I/O interfaces of DOBOT Magician V1 and V2 stays the same, while the functions of specific multiplexed I/O interfaces differ in different versions. Detailed changes for multiplexed I/O Interface on the forearm, base peripheral and UART are shown in the below pictures, respectively. Blue means the function is both supported by V1 and V2; gray means it is only supported by V1. No caption means no change for the multiplexed function.
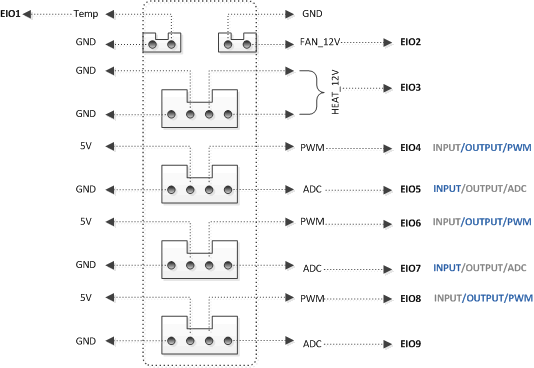
Figure 3.1 - Peripheral interface in the Forearm
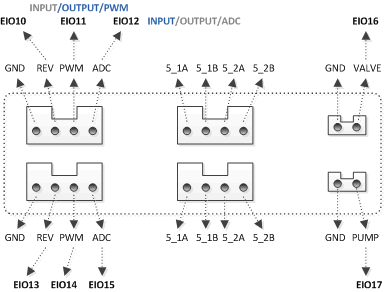
Figure 3.2 - Base peripheral interface
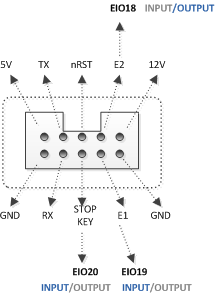
Figure 3.3 - Base UART interface
3.1.2 Other Differences
Table 3.1 - Magician V1 vs V2
|
V2 Version
|
V1 Version
|
Change
|
|
Rail return switch connects GP2
|
Rail return switch connects 10PIN port
|
Upgraded the hardware and limited the usages of some ports to protect the device.
|
|
Automatic leveling tool connects GP4
|
Automatic leveling tool connects GP3
|
|
USB to serial port driver selects CP210x
|
USB to serial port driver selects CH340
|
Replaced the serial port chip
|
|
Ports have different colors based on their type
|
All ports have the same color
|
Easier to distinguish interfaces and prevent incorrect connection
|
3.2 Photoelectric Sensor Comparison
Table 3.2 - Photoelectric Sensor V1 vs V2
|
Photoelectric Sensor V2
|
Photoelectric Sensor V1
|
Change
|
|
Connects GP1, GP4, GP5
|
Connects GP1, GP2, GP4, GP5
|
The 4PIN port function was modified
|
3.3 Color Sensor Comparison
Although the V1 and V2 versions of the color sensor connection interface have not changed, the way the color sensor recognizes the color changes.
Table 3.3 - Color Sensor V1 vs V2
|
Color Sensor V2
|
Color Sensor V1
|
Change
|
|
The color sensor identifies color via communication interface
|
The color sensor identifies color via I/O interface
|
The 4PIN port function was modified
|
3.4 Rail Kit Comparison
Table 3.4 - Rail Kit V1 vs V2
|
Rail V2
|
Rail V1
|
Changes
|
|
Rail return switch connects 4PIN port
|
Rail return switch connects 10PIN port
|
Upgraded the hardware and limited the usages of some ports to protect the device.
|
4. Compatibility
4.1 Connection
DOBOT Magician supports different versions of peripherals (slide kit, photoelectric sensor, color sensor). When the DOBOT Magician version is different from the peripheral version, the connection descriptions are as follows.
4.1.1 Rail Return Switch
Table 4.1 - Compatibility Description
|
Magician Version
|
Rail Version
|
Rail Return Switch Connecting Port
|
|
V2
|
V1
|
GP2 (a patch cord is needed for connecting)
|
|
V1
|
V2
|
GP2
|
- When the user controls the rail via Blockly, the corresponding version of rail should be selected.
- If the rail kit version is V2, you need to select “New Rail” in “Settings > General” of DobotStudio interface when controlling the robot arm through DobotStudio.
4.1.2 Photoelectric Sensor
Table 4.2 - Compatibility Description
|
Magician Version
|
Photoelectric Sensor Version
|
Photoelectric Sensor Connecting Port
|
|
V2
|
V1
|
Connect GP1/GP4/GP5 via wire jumper
|
|
V1
|
V2
|
GP1/GP2/GP4/GP5
|
Jumper method: Take the GP1 interface as an example. The photoelectric sensor is triggered by I/O 11 INPUT. For the V2 version of the robot arm, the I/O multiplexing function changes. I/O 11 has no INPUT function, but I/O 12 supports INPUT, so the photoelectric sensor should be connected to the I/O 11 pin to manually access the I/O 12.
When the user sets the photoelectric sensor interface through Blockly, you need to select the version corresponding to the photoelectric sensor and select the appropriate connection port.
4.1.3 Color Sensor
Table 4.3 - Compatibility Description
|
Magician Version
|
Color Sensor Version
|
Color Sensor Connecting Port
|
|
V2
|
V1
|
GP2
|
|
V1
|
V2
|
GP1/GP2/GP4/GP5
|
When the user sets the photoelectric sensor interface through Blockly, you need to select the version corresponding to the color sensor and select the appropriate connection port.
4.2 API Changes
Photoelectric sensors, color sensors, and rail kits come in different versions. In order to enable the robot arm to support different versions of the peripherals, the corresponding API interface has also changed, the specific interface is as follows.
- Version number needs to be set when enabling the rail.
Table 4.4 - Set the status of the rail
|
prototype
|
int SetDeviceWithL(bool isEnable, bool isQueued, uint64_t *queuedCmdIndex, uint8_t version)
|
|
function
|
Set the rail status. If you use a rail kit, you need to call this API
Before sending the instructions related to the slide rail, the slide rail status must be set.
|
|
parameter
|
isEnable: 1, start the rail. 0, close the rail.
isQueued: Whether to add this instruction to the instruction queue
queuedCmdIndex:If you choose to queue the instruction, it indicates the index number of the instruction in the queue. Otherwise, this parameter is meaningless.
version: version number of rail. 0: V1; 1: V2
|
|
return
|
DobotCommunicate_NoError: instruction returned normally
DobotCommunicate_BufferFull: the instruction queue is full
DobotCommunicate_Timeout: no return of instruction, resulting timeout
|
- Version number needs to be set when enabling the photoelectric sensor and select the appropriate port according to the table below.
Table 4.5 - Enable photoelectric sensor
|
prototype
|
int SetInfaredSensor(bool enable,InfraredPort infraredPort, uint8_t version)
|
|
function
|
Enable photoelectric sensor
|
|
parameter
|
InfraredPort definition:
enum InfraredPort{
IF_PORT_GP1;
IF_PORT_GP2;
IF_PORT_GP4;
IF_PORT_GP5;
};
enable: status. 0: not enabled; 1, enabled
infraredPort: port that the photoelectric sensor is connected to the robot, please select the corresponding interface
version: version number of the photoelectric sensor. 0: V1; 1: V2
|
|
return
|
DobotCommunicate_NoError: instruction returned normally
DobotCommunicate_Timeout: no return of instruction, resulting timeout
|
- Version number needs to be set when enabling the color sensor interface and select the appropriate port according to the table below.
Table 4.6 - Enable color sensor
|
prototype
|
int SetColorSensor(bool enable,ColorPort colorPort, uint8_t version )
|
|
function
|
Enable color sensor
|
|
parameter
|
ColorPort definition:
enum ColorPort {sss
IF_PORT_GP1;
IF_PORT_GP2;
IF_PORT_GP4;
IF_PORT_GP5;
};
enable: status. 0: not enabled; 1, enabled
colorPort: port that the color sensor is connected to the robot, please select the corresponding interface
version: version number of the color sensor. 0: V1; 1: V2
|
|
return
|
DobotCommunicate_NoError: instruction returned normally
DobotCommunicate_Timeout: no return of instruction, resulting timeout
|