Want to improve the quality of your 3D printing? Want to know how to deal with print failures? Here is the most comprehensive guide to help you diagnose and fix your printing issues. 3D printing provides you with incredible creation and prototyping power. With a 3D printer like the MOOZ 3-IN-1, you can create anything from a simple plastic clip to a full-sized Captain America's shield. The only limitation is your imagination.
Now, as fun and interesting as that might sound, your 3D printer can bring you close to frustration. This is because there are a lot of 3D printing troubleshooting issues that are bound to come up when you use your machine. How do we know this? We own and manufacture these printers, which make us experts on this subject. We discussed the 3D printing challenges our users and clients have tackled with. We provide a comprehensive guide on ten common 3D printing issues.
Directory
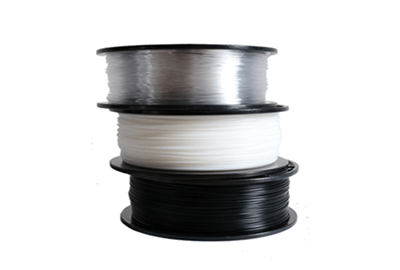
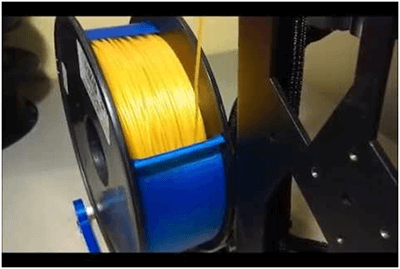
The Problem - Out of Filament
You have configured and set the model in the slicing software but yet nothing seems to happen; no printing is actually taking place. You have repeatedly sent a print to the printer but all you're getting in return is a filament spit coming out of the nozzle. Or maybe the model is about to be printed, and out of nowhere, the filament extrusion stops working, but the nozzle continues its run without any printing.
The Cause
While this problem is obvious on machines that have their filament reel in full views, like the PRUSA i3, some machines are not designed with exposed filament reels, such as the MOOZ, Ultimaker, and Robox, which will make it a little difficult to immediately detect the problem. These types of 3D printers either have their filaments encased or hidden at the back of the printer.
The Solution
The 3D printing troubleshooting process is quite easy. No matter what type of 3D printer you are deploying, all you'll have to do is remove the remaining filament and load in new material. Check the filament reel. If there is no material, load in another reel. Magic happens.
The second 3D printing FAQ we will tackle from our list of common 3D printing issues is the nozzle being too close to the print bed.
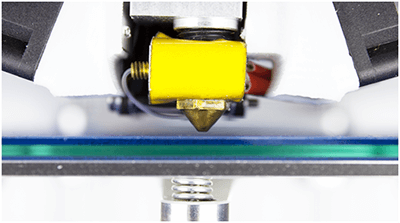
The Problem
You've loaded the filament correctly, and nothing seems to be wrong with the print head, yet, no filament is being deposited on the print bed.
The Cause
Simply put, the nozzle and the print bed may be too close to each other. You may have inadvertently turned your print bed away from your nozzle opening, giving the melted filament little room to escape. The best-case scenario is that your print might miss its first few layers, and the chances of it not sticking when the filament does not extrude will be high. As for the worst-case scenario, your printer's hot end will have a backup of a melted filament which will definitely increase the chances of a blockage.
The Solution
There are two main ways to do this 3D printing troubleshooting:
- The Z-Axis Offset - This method involves raising the nozzle a bit. Most 3D printers have a Z-axis offset setting in their system setting. With this setting, you can raise your nozzle a little high from the print bed by giving the Z-axis setting a positive value. However, putting a negative value in the Z-axis offset setting will help you fix sticking issues, that is, if your prints are not sticking to the print bed. Therefore, you need to ensure that when setting a value, it isn't too high so your prints can stick to the bed.
- Lower the Bed - This is an alternative solution as not all 3D printers allow the lowering of the print bed. But if your printer allows it, you can do it to fix this problem. It is a more upsetting fix, though, given the fact that you'll have to level and recalibrate the bed.

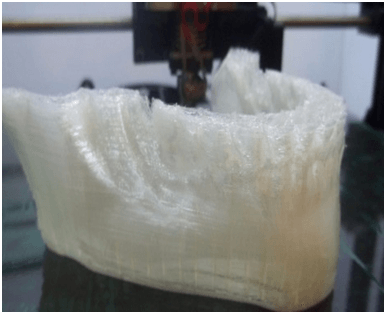
The Problem - Print Looks Droopy and Stringy
This common 3D printing issue simply implies that the printer is taking in more material than what it requires. Therefore, it produces more material than it needs Printed models will have excess materials on them.
The Cause
Basically, the Flow setting or Extrusion multiplier setting in your slicing software is higher than normal.
The Solution
To troubleshoot this 3D printing problem, go to your slicer software and check your Extrusion multiplier setting. Ensure that you have selected the right value. If all seems to be okay, go to the Flow setting and decrease it.
The Problem
Your print's internal structure is either broken or missing.
The Cause
To be candid, there are many reasons why the internal structure of your model can be broken or missing. Although the most common is having incorrect settings in your slicing software, a slightly blocked nozzle can also bring up this problem.
The Solution
- Take a look at the fill density. Open your slicing software and take a look at the infill density. The best value is 20%; if the value is less than this, then you are bound to encounter problems. If you are running large prints, though, increase this value so as to ensure that the model you are about to print gets enough support.
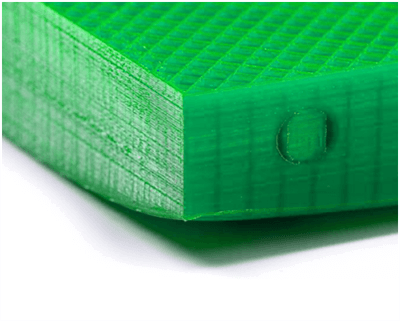
The Problem - Bending
The printed model bends upward at the base until it no longer aligns with the printed platform. This leads to the print being unstuck on the print bed and horizontal cracks forming in the upper parts of the printed models.
The Cause
Warping or bending happens because it is a natural characteristic of plastics. As your PLA or ABS filament cools down, it slowly starts to contract. If the plastic's cooling process happens too fast, it results in warping or bending.
The Solution
There are six different ways to troubleshoot this 3D printing FAQ:
- Use a heated platform - This is the easiest solution; all you have to do is set the heated platform to a glass transition temperature (a temperature that's just below the melting point of the plastic). You can do this by using the slicer software, and you can easily get the recommended filament temperature on the spool or packaging of your filament. The first layer will remain flat on the platform if you set the right temperature.
- If the print platform calibration isn't right, then you are bound to encounter this problem. So what 3D printing troubleshooting tip will work here? Well, all you have to do is level the print by rechecking the calibration, and ensure that the bed aligns to have a perfect nozzle height.
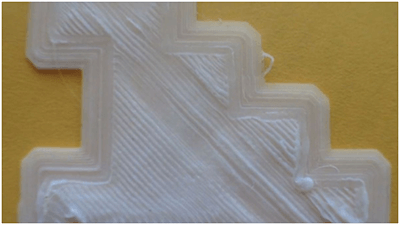
The Problem
This is another common 3D printing issue faced by a lot of users. A print's first layers are often problematic. The problems are usually a non-sticky print, or the bottom shell has an erroneous look due to lines. Also, instead of getting a fine detail on your print's bottom, you find a blurry, congealed design that does not look like the surface design.
The Cause
The blurry and undefined detail on your print simply implies that the print bed temperature is too high. These lines happen as a result of the nozzle and the bed being too far apart, while you get blobs if the nozzle is way too close to the bed. Additionally, a non-sticky print is as a result of a bed that hasn't been properly leveled.
The Solution
Reduce the bed temperature. Do this by getting the temperature down five degrees; continue reducing the temperature until you get the desired adhesion result without losing any detail.
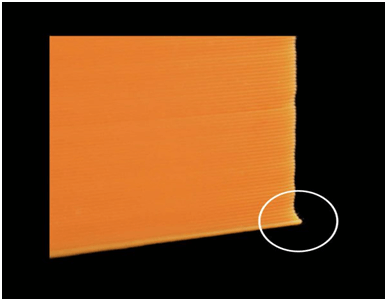
The Problem
Elephant's foot is a 3D printing term that refers to the outward bulge of a model's base. It is when the print bows or curves out at the bottom.
The Cause
This usually happens when the weight of the model is pressing down on its base before it cools back to solid.
The Solution
Another 3D printing troubleshooting tip you can use is to ensure that the base layers get enough coolness to support the top structure. You need to ensure that the cooling is just the right amount as too much cooling will cause the base layers to get warped. You might find this part tricky but the best way to go about this 3D printing troubleshooting process is to lower the print platform's temperature by five-degree intervals to about plus or minus twenty degrees of the temperature recommended. If you have your Bottom/Top thickness set to 0.6mm, you can start the fan at a height that's slightly lower than that.
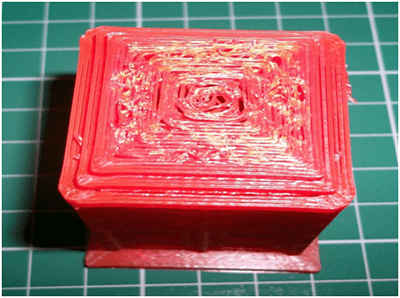
The Problem
This problem is one of the most asked questions in our 3D printing FAQ. The filament has a resilient characteristic to all misconfiguration types, making it hard for users to detect when the hot end of their 3D printer is over-heating. You just notice uneven layers and when you take a closer look at the cabin, you'll see that the model is melted while on the chimney you get something that's close to a wax being melted down a candle.
The Cause
The cause of this problem is an overheated hot-end. Your printer's temperature needs to be properly balanced to allow the filament to flow well and also solidify quickly. A balanced temperature will also enable the next layer to be placed on a more solid surface. However, before you adjust the temperature, ensure that you have the correct material set up for the printer. If you check the material settings and everything looks okay, all you might need to do is probably a slight adjustment.
The Solution
- Check if your material setting is right. The proper material temperature settings range between 180 degrees Celsius and 260 degrees Celsius.
- Reduce your printer's hot-end temperature. With your software or printer's hot end temperature settings, this can be done. Reduce the temperature by five degrees Celsius, depending on how hot the temperature is.
The Problem
Nothing is coming out of the nozzle, but when you look at the filament spool, you can see it's full, and the feed tube also appears to have some filament in it. This problem is common to Bowden feed printers; it's not usually found in direct feeds. This is because the filament is usually hidden. Therefore, you can't see them immediately.
The Cause
This problem can be caused by different factors, but the most common one is cheap or old filament. While most ABS and PLA filaments have a long lifespan, they can become brittle if kept in bad weather conditions. And once they become bad, no amount of adjustment can make them right when they are fed to the printer.
The Solution
- Try making use of another filament. Try using another filament if you encounter the same issue after the filament has been reloaded. This will let you know if the brittle filament is the cause of the problem.
- Check your printer's temperature and flow rate. If the problem persists, check to see if the hot end is at the right temperature and getting hot like it's supposed to. You should also check if the filament's flow rate is not higher than a hundred percent.

The Problem
You get cracks on the sides of your models, especially when you are making taller models. This is considered one of the most surprising problems one can experience in 3D printing. This is because it usually shows up in larger prints, and it mostly occurs when you are not looking.
The Cause
The cause of this problem is that the materials cool faster in your print's higher layers. The heat generated by the print bed does not get to the upper parts, making the upper layers less adhesive.
The Solution
Increase the extruder temperature by ten degrees Celsius. Take a look at the side of the filament's box. You'll find the recommended temperatures for the hot end. Try to keep your 3D printer's temperature setting within these values.
CONCLUSION
There are a lot of 3D printing troubleshooting issues, but these ten are some of the common ones you are bound to come across. Feel free to ask any questions in the comment. You can also send us your email address or contact information so we can provide you with more information on 3D printers.
And if you are looking for the best 3D printer on the market, we recommend getting the MOOZ 3-in-1 3D printer.